
During the holiday gift buying season, it’s pretty apparent how much everyone loves our ornaments! They look great on a Christmas tree, of course, but they also look great hanging in a sun-filled window or floating in a garden pond!
Ever wondered exactly how we make them? Glassblower Aaron Quigley was producing some in the studio recently, so we decided to get some process shots. Here’s how they’re made:
Step 1: The Gather
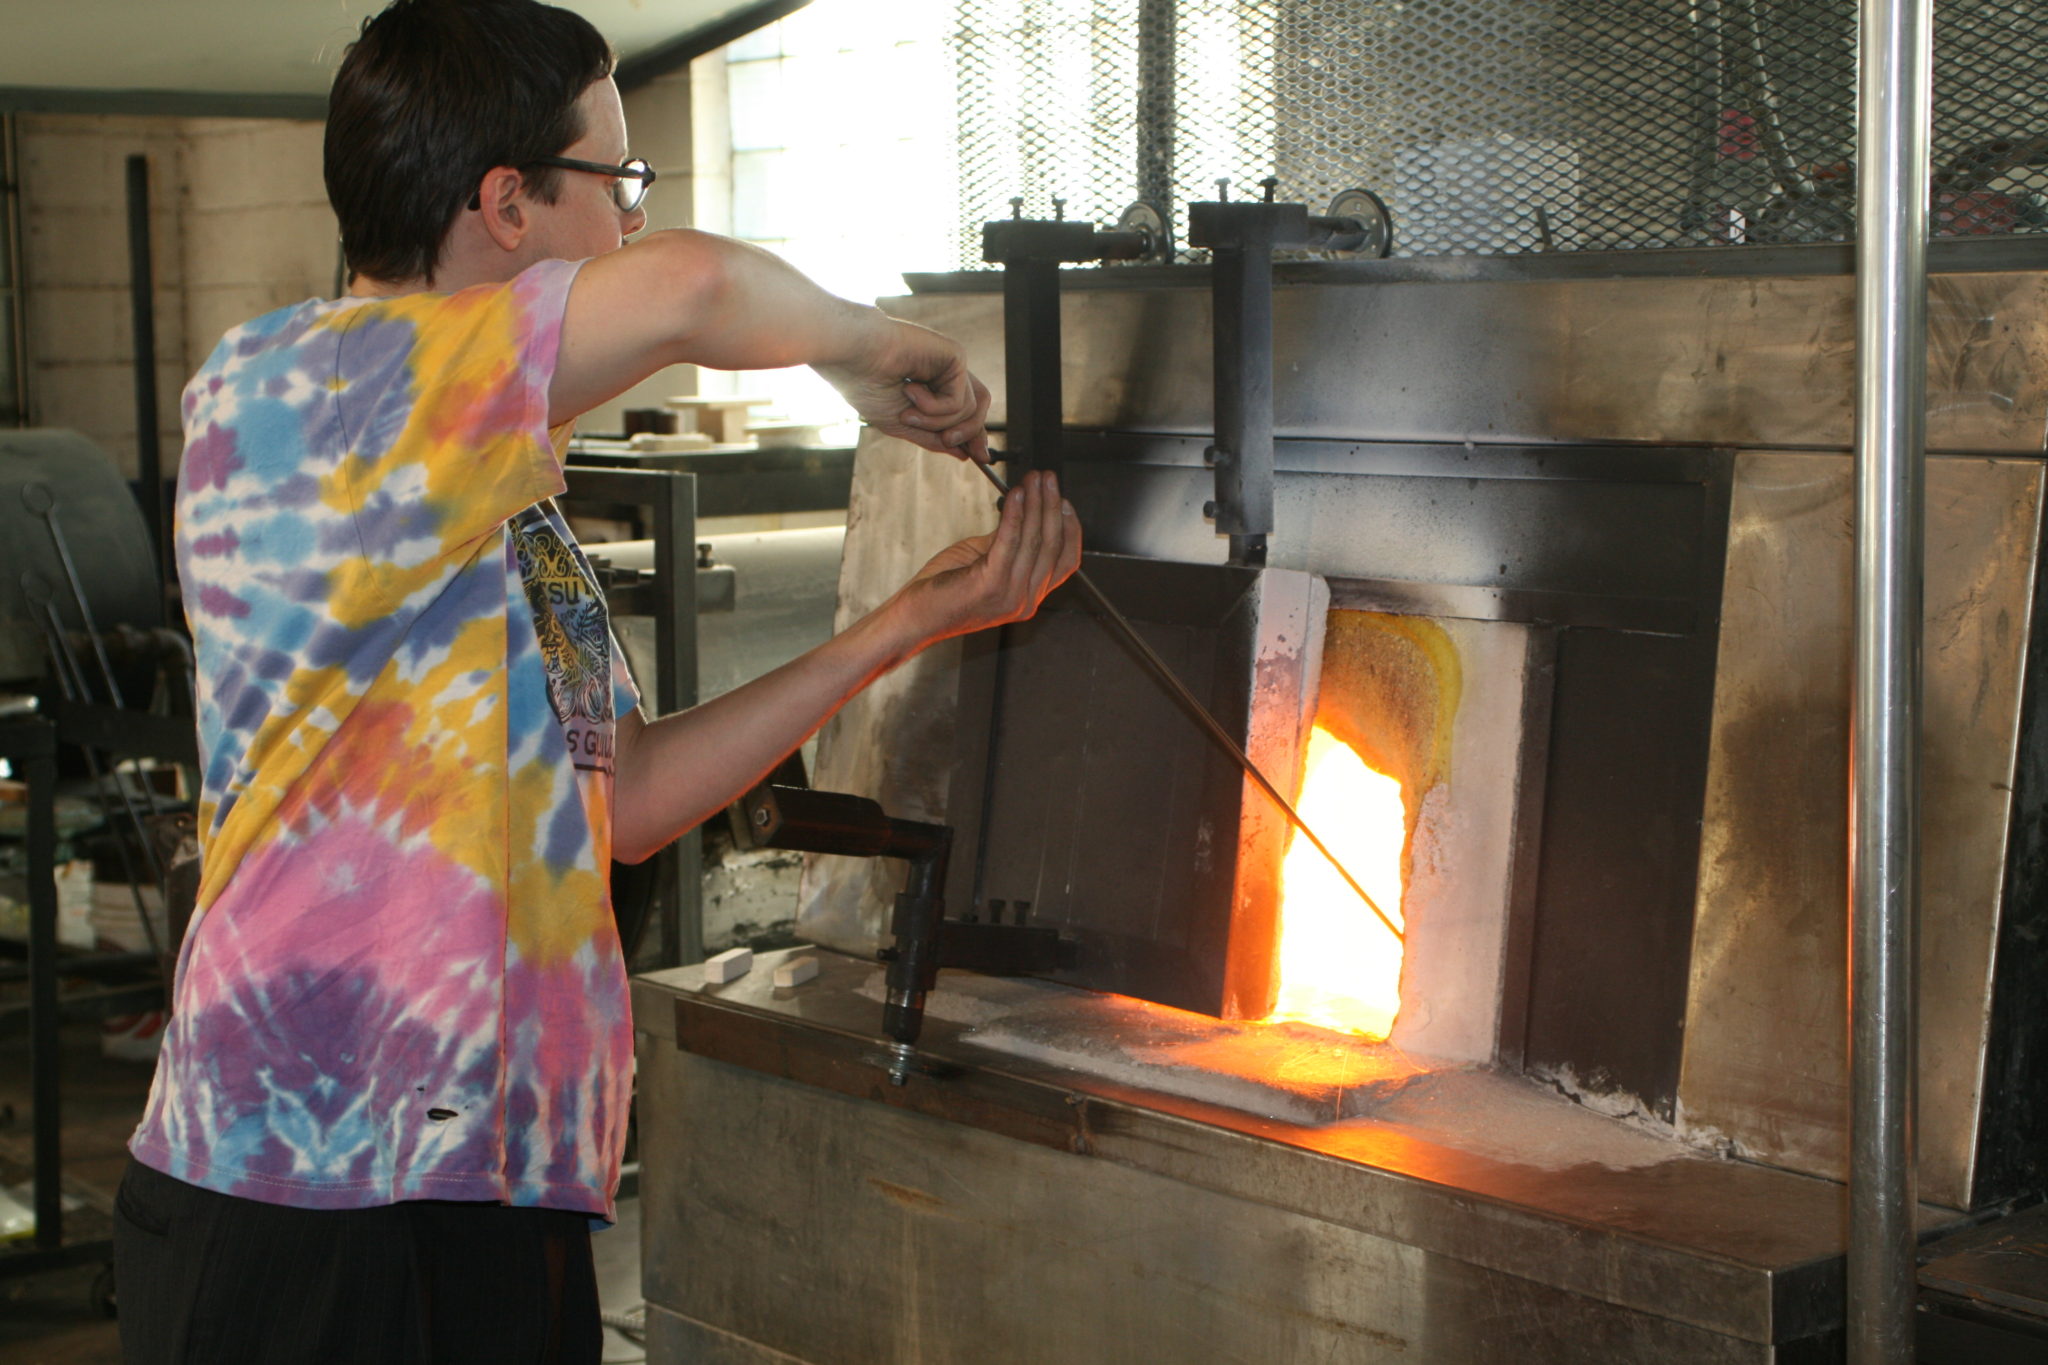
Aaron twists a pipe, called the “blow pipe,” inside a 2000ºF furnace to gather molten clear glass. The glass is contained inside a ceramic crucible, and sticks to the pipe when collected.
Step 2: Frit
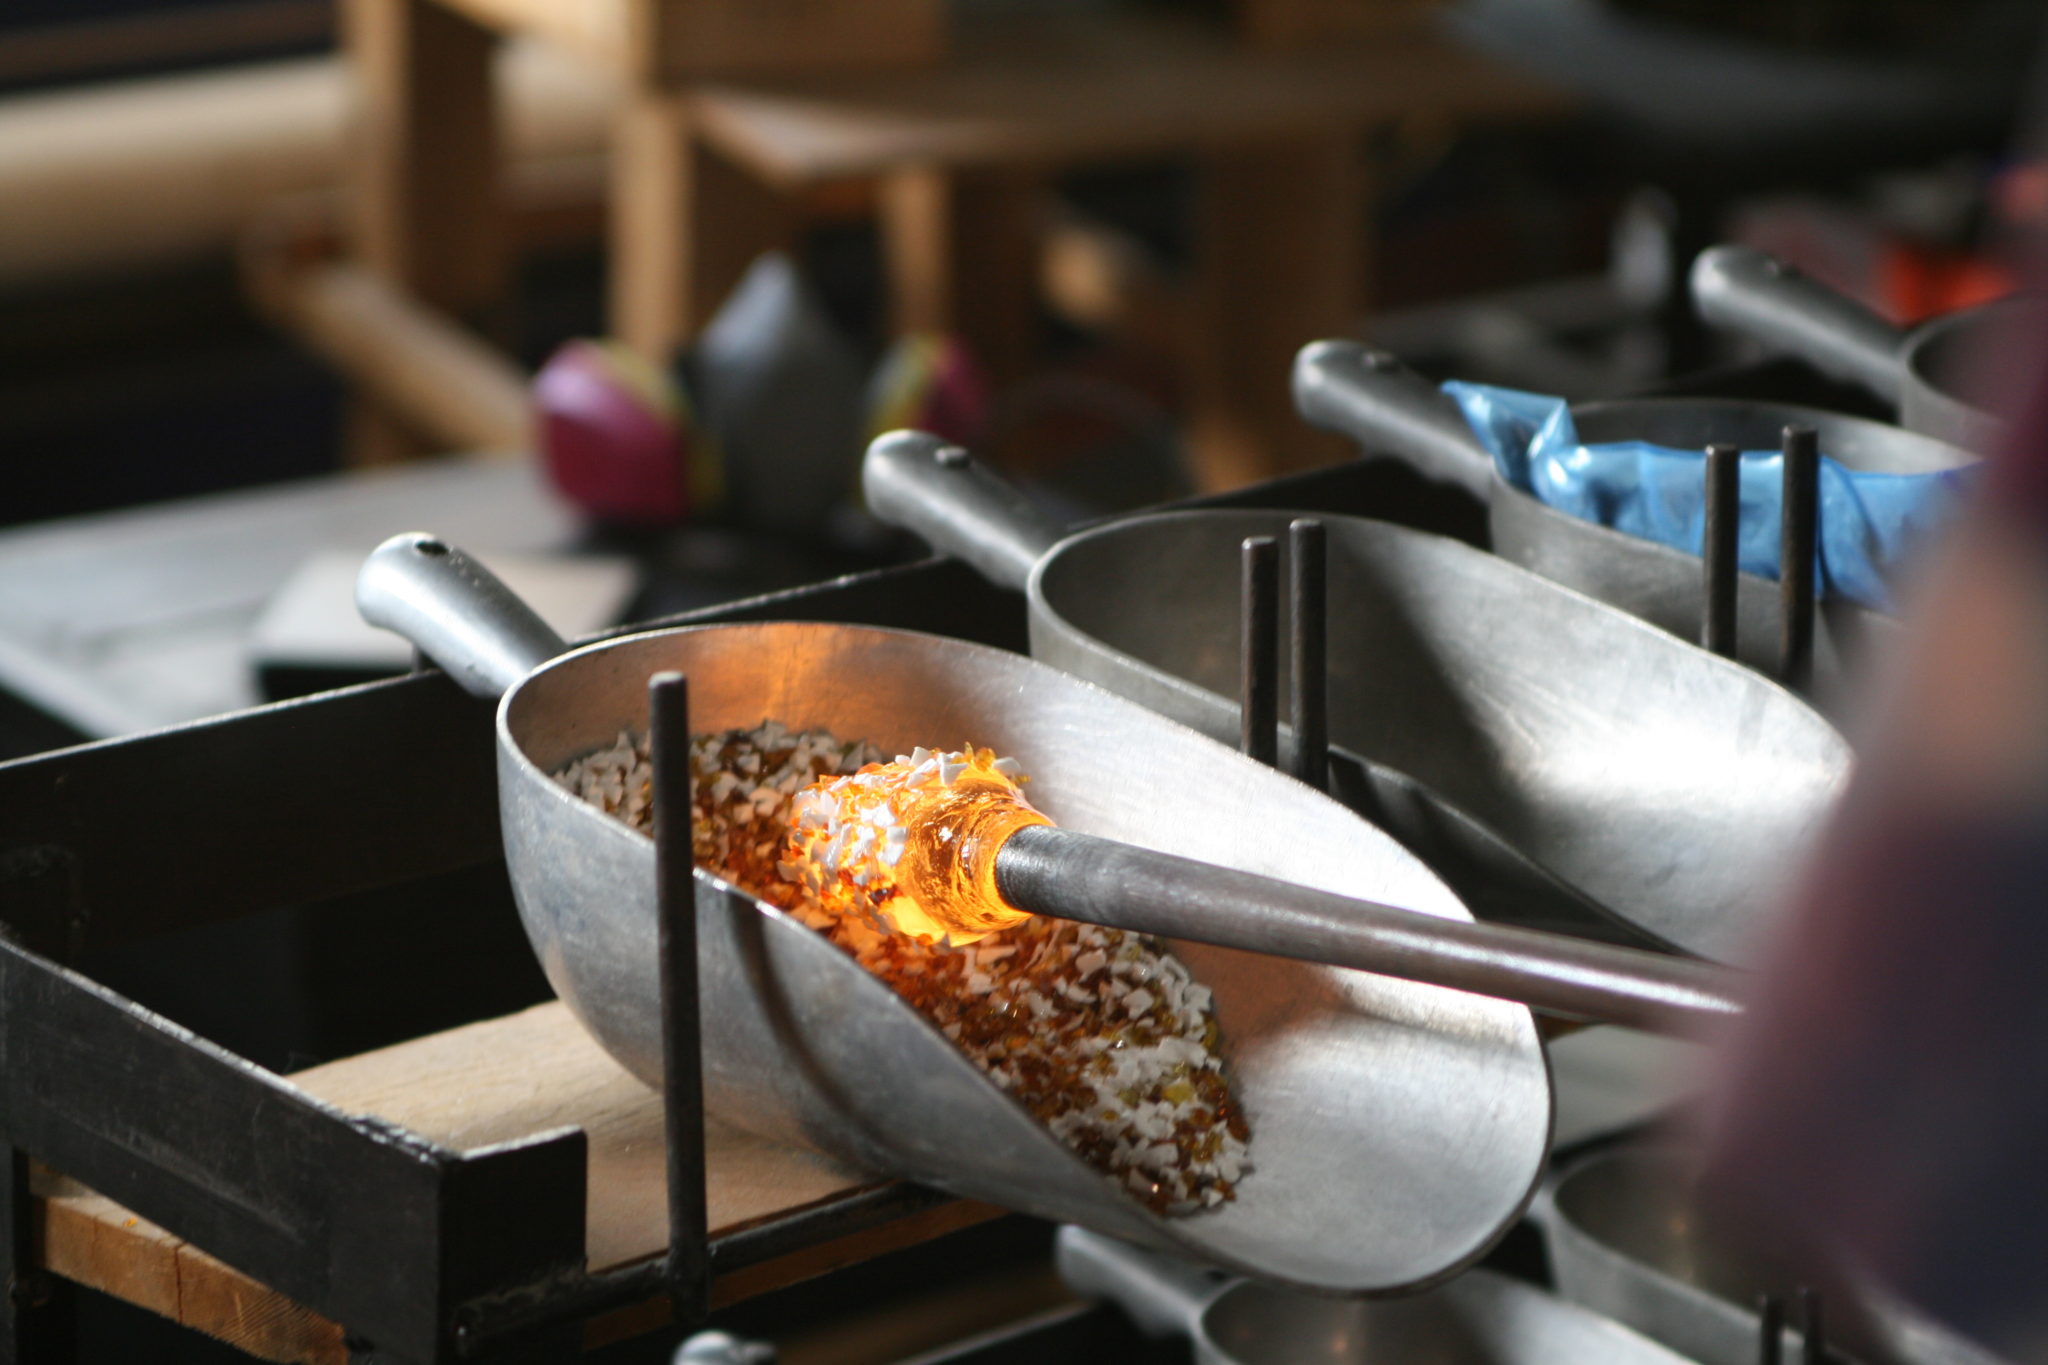
Aaron places the glowing molten glass into a tray of frit, or small glass crystals, to give them their color. He twists the pipe into the frit so the ornament is almost completely covered.
Step 3: Reheating

2000ºF glass cools fast! Aaron rotates the glass inside a reheating furnace to bring it back up to temperature.
Step 4: Smoothing

Aaron smooths out the glass inside a “block” to make it as consistently round as possible.
Step 5: Inflate
 Aaron sits at the bench. Using a hose attached to the end of the blowpipe, Aaron inflates the molten glass with air from his lungs while simultaneously keeping the pipe on rotation with his left hand, and thins out the glass at the top of the ornament with the jacks in his right hand. Multitasking at its finest!
Step 6: Breakaway

At this point, the glass has cooled enough to a solid state. Holding the pipe upright, Aaron lowers the ornament onto a stand. With just a light tap on the blow pipe, the ornament breaks loose.
Step 7: Second Gather
 Taking another gather of clear glass with a new pipe from the furnace (as in Step 1), Aaron dabs the glass on top of the ornament.
Step 8: The Hook

The newly attached glass is snipped off and, using tweezers, twisted to create the ornament hook.
Final Step: The Annealer
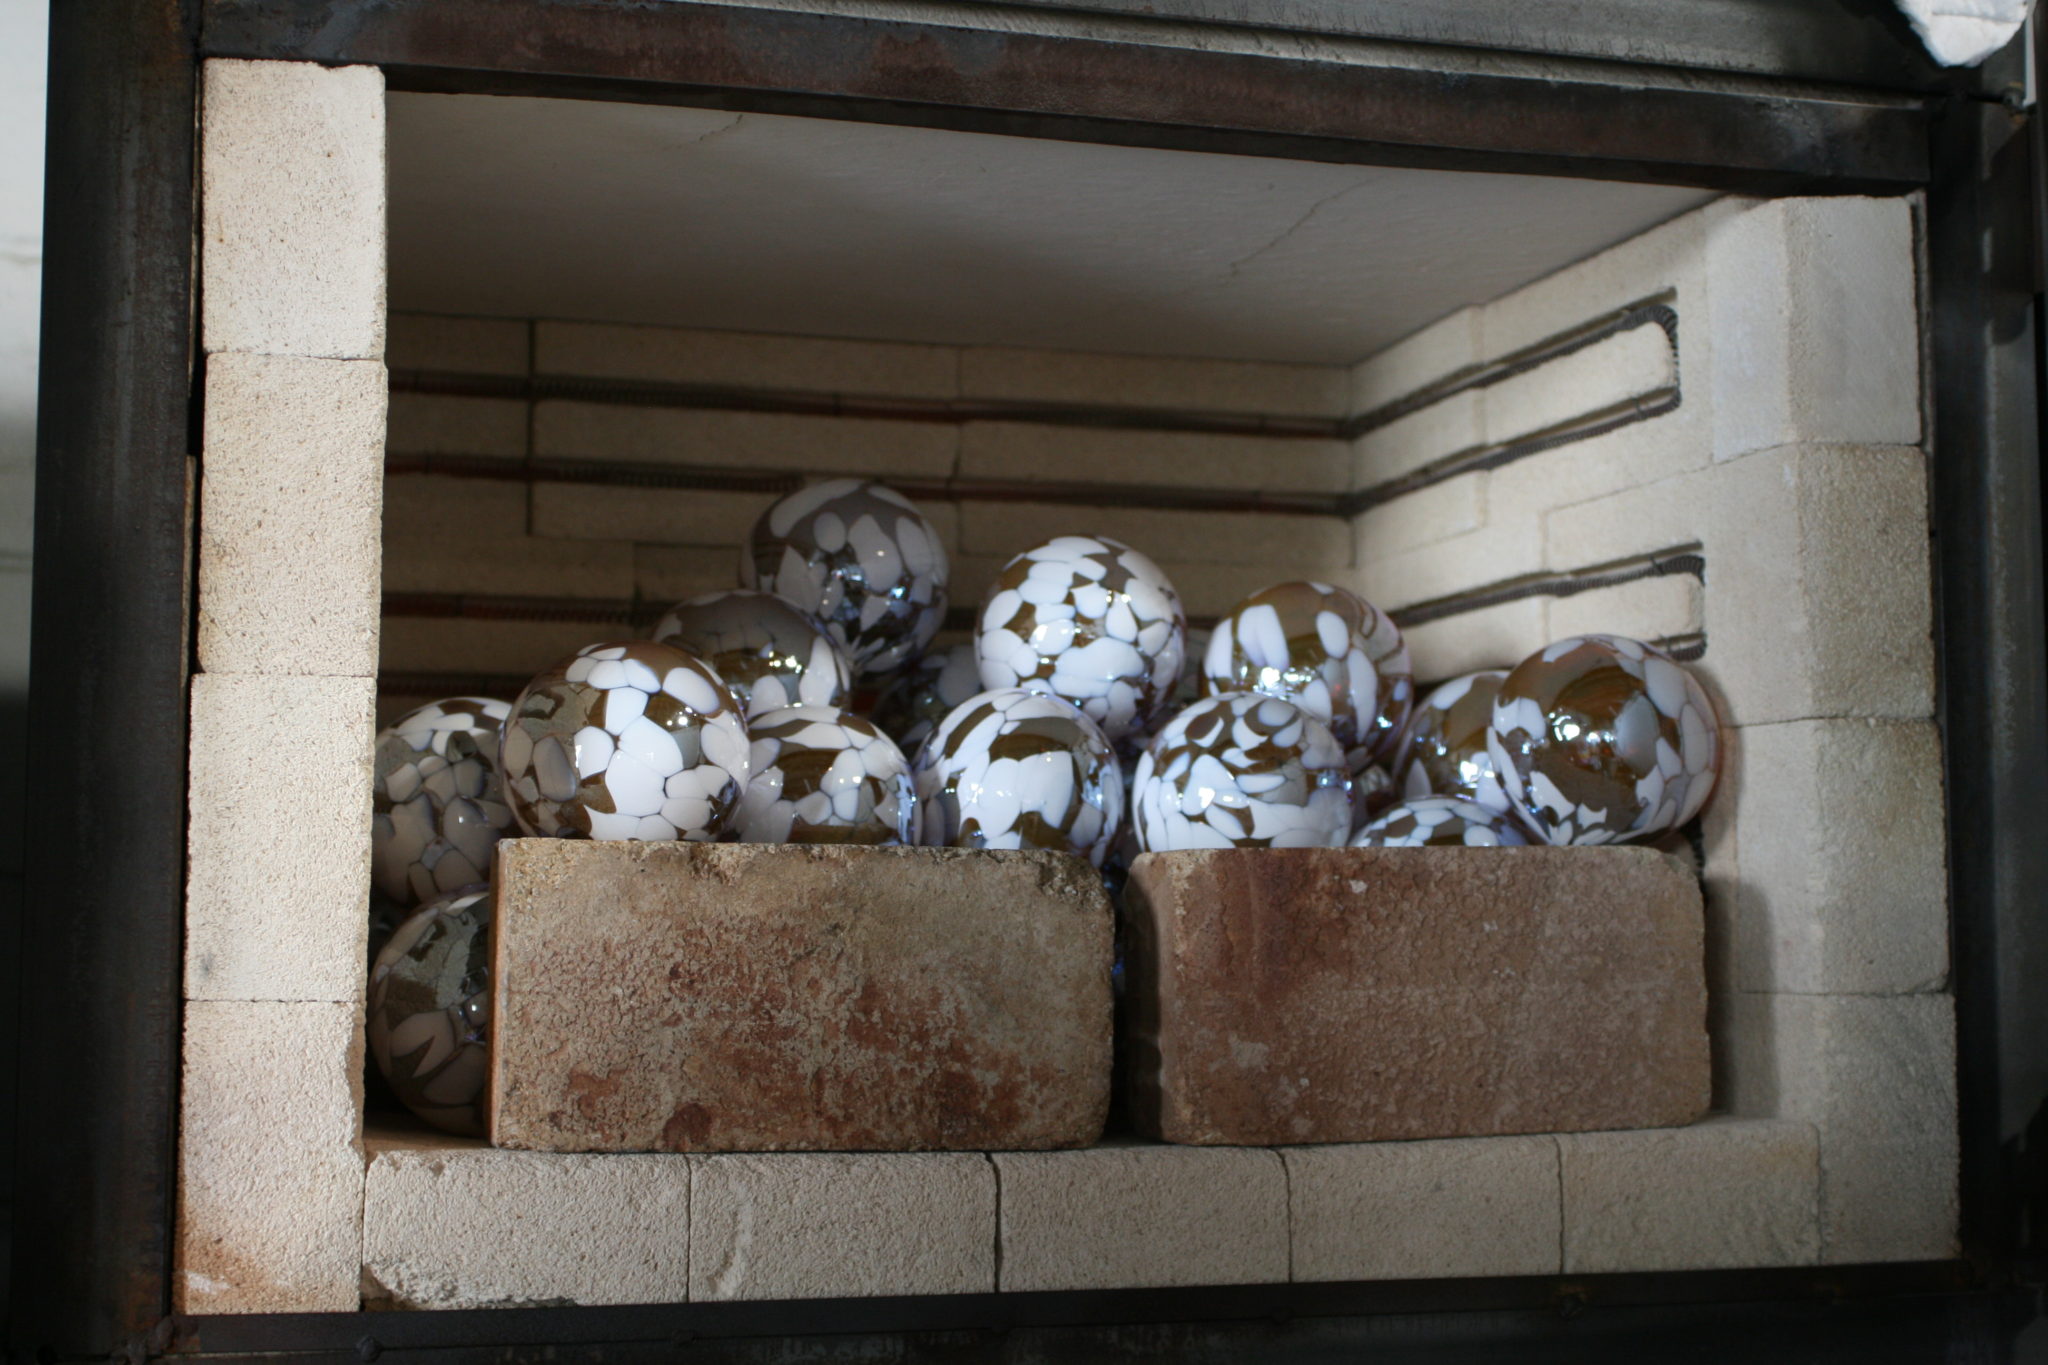
The finished ornament is placed in the annealer. Annealing, or gradual cooling, is important, as rapid temperature change causes thermal shock which makes glass crack or break. After 24 hours, the ornament is room temperature and ready to go home!
You can learn to make your own! Sign up for one of our ornament making experiences in the Hotshop or Flameworking studios!
Or stop by anytime during our holiday hours to see our full selection of blown glass ornaments, as well as hundreds of other beautiful glass gifts!